Nkapio keeps two related things side by side under this heading, and it helps to know which one you need before you start:
- A business expense is money that has already left one of your accounts — a supplier bill, fuel, rent, a repair. You record it against the account it was paid from, and it reduces that account's balance straight away.
- An expense claim is money a staff member spent out of their own pocket on the business's behalf, and now expects back. A claim is submitted, reviewed, approved (or rejected), and finally reimbursed.
The difference matters because they behave differently: an expense posts to your books the moment you save it, while a claim only touches an account once it is approved and paid.
Step 1 — Open the list
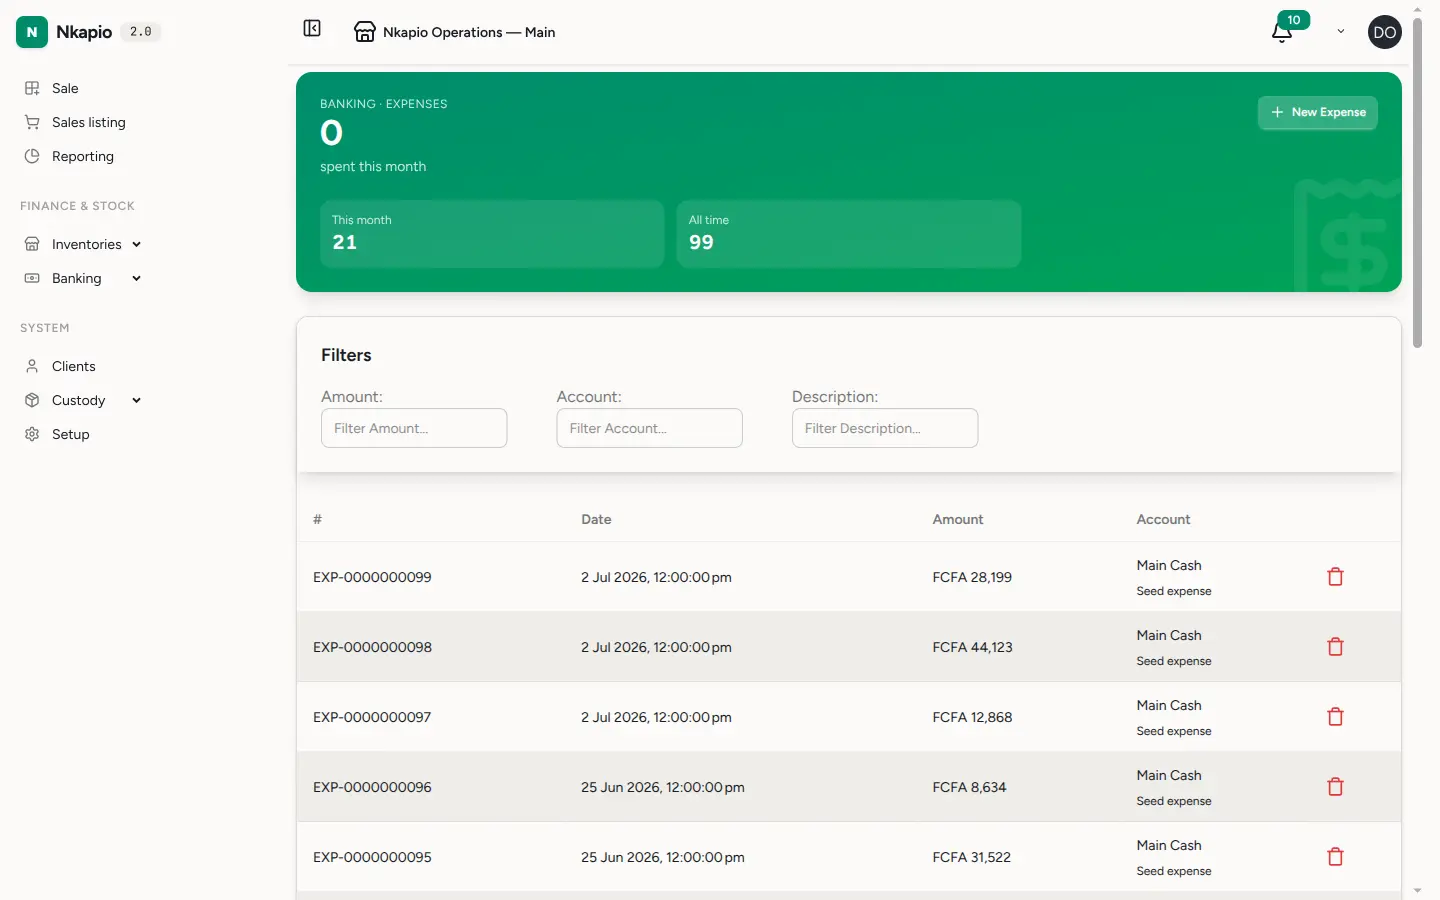
Click Expenses in the sidebar to see what your business has spent, or open Expense Claims under staff to review reimbursement requests. Each claim shows the employee, its number, date, title, amount and status, and you can filter by status, employee or date range to find one quickly.
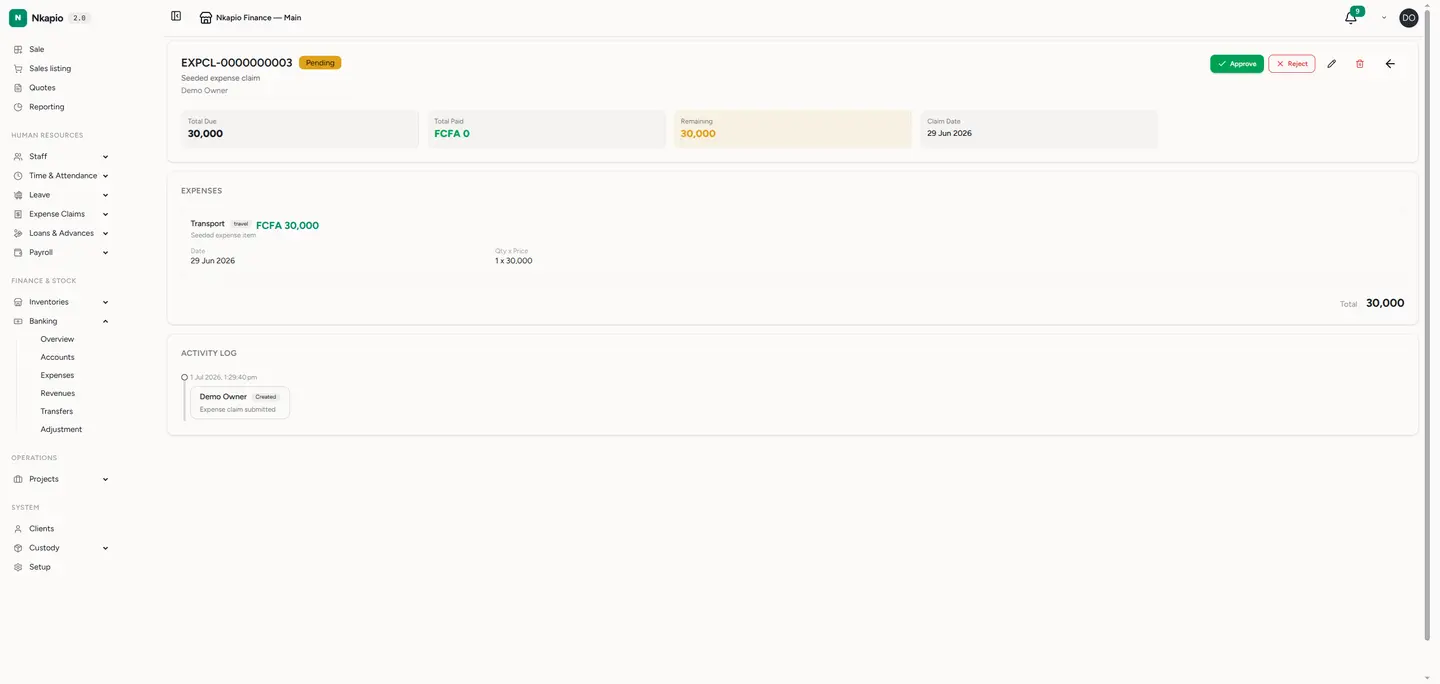
A claim moves through clear stages, shown as a coloured badge: Pending while it waits for a decision, Approved once signed off, Rejected if sent back, and Paid when it has been reimbursed in full.
Step 2 — Review and approve
Open a claim to see its line items, the receipts attached to it, and who submitted it. Each line carries its own description, quantity, price, date, category and the vendor it was paid to, and the claim totals them for you.
- Approve to sign the claim off — it records who approved it and when, and moves the claim to Approved, ready to be paid.
- Reject to send it back with a reason. The submitter sees your note and can fix the details and resubmit, which returns the claim to Pending.
Every action — created, updated, approved, rejected, paid, resubmitted — is kept in the claim's activity log, so there is always a record of who did what.
Step 3 — Record a new entry
For a business expense, click New Expense, choose the account it was paid from, set the date, enter the amount and any VAT, and add a description. Saving it reduces that account's balance and posts the expense to your books immediately — there is no approval step.
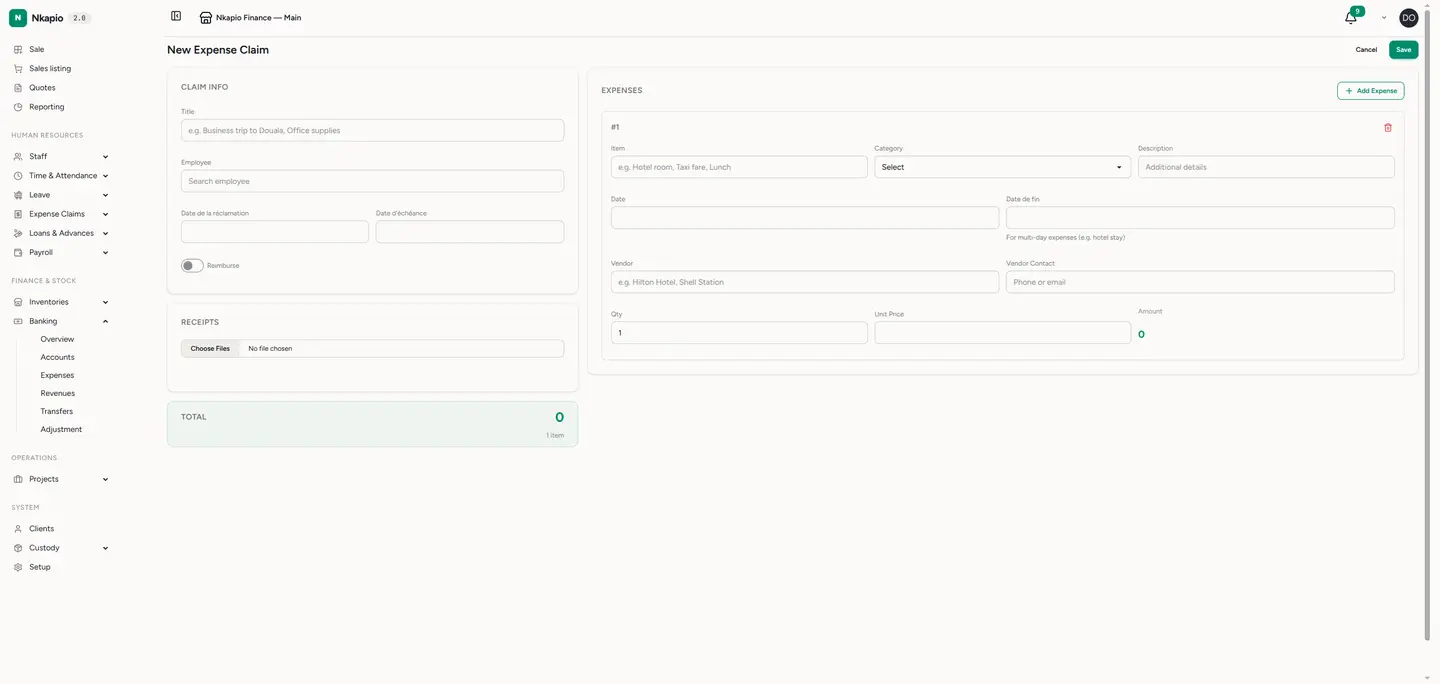
For a claim, click New Claim, pick the employee, give it a title and dates, and add a line for each thing they paid for. Attach a photo of each receipt as you go — it stays linked to the claim so approvers never have to chase paperwork.
Tip: attach the receipt at the moment you record the item, not later. A claim with its receipts already attached moves through approval far faster.
Paying a claim
Once a claim is approved you reimburse it, in full or in parts, from one of three routes:
- Cash — a direct payment from a cash or bank account.
- Payroll — settled through a payroll period, so the amount is paid alongside the employee's salary.
- Advance — offset against an outstanding advance the employee already holds. When you approve a claim, Nkapio automatically settles it against any advance marked for expense adjustment, so you may find part of it already covered.
Each payment is added to the claim's running total; once payments cover the full amount, the claim flips to Paid.
Good to know
- You need the right permission to create, approve or pay claims — approval and payment are usually reserved for managers and accountants.
- Categories and vendors are entered per line on a claim, so you can split one trip across several categories.
- A business expense reduces the account you choose, so record it against the account it was genuinely paid from to keep balances accurate.