Reminders are Nkapio's built-in follow-up list. Use them for the small things that keep a business running — call a client after a treatment, confirm the weekend's bookings, restock a product before it runs out, chase an unpaid invoice. Each reminder has a date and time, a priority, and a type so your team always knows what's next and how urgent it is.
Think of Reminders as a working checklist you keep an eye on. Nkapio doesn't send a separate alert when one falls due, so you stay on top of them by filtering the list — and the reminders you create also appear on your Calendar on their date.
Before you start
- The Reminders feature must be turned on for your workspace. If you don't see it in the sidebar, an owner can enable it.
- You need permission to create reminders. If you can't see the New Reminder button, ask an owner to grant it in your role.
- At least one reminder type must exist — the type is required when you save a reminder. If the type dropdown is empty, set one up first (see Step 3).
Step 1 — Open Reminders
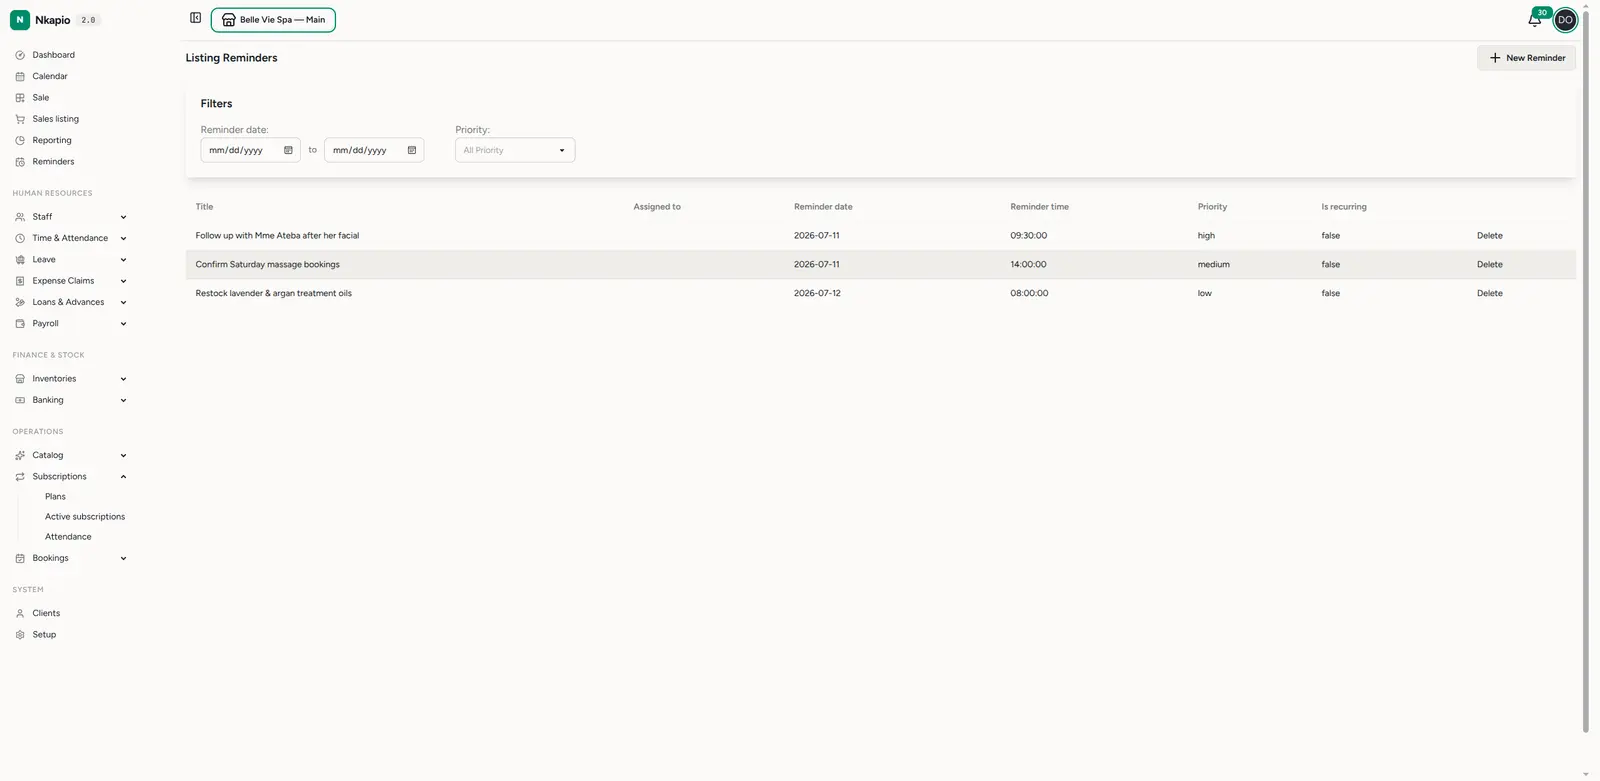
Click Reminders in the sidebar. You'll see every reminder in one list, with its title, who it's assigned to, the reminder date and time, priority, and whether it repeats. Use the Reminder date and Priority filters at the top to narrow the list down to what matters today.
Step 2 — Create a reminder
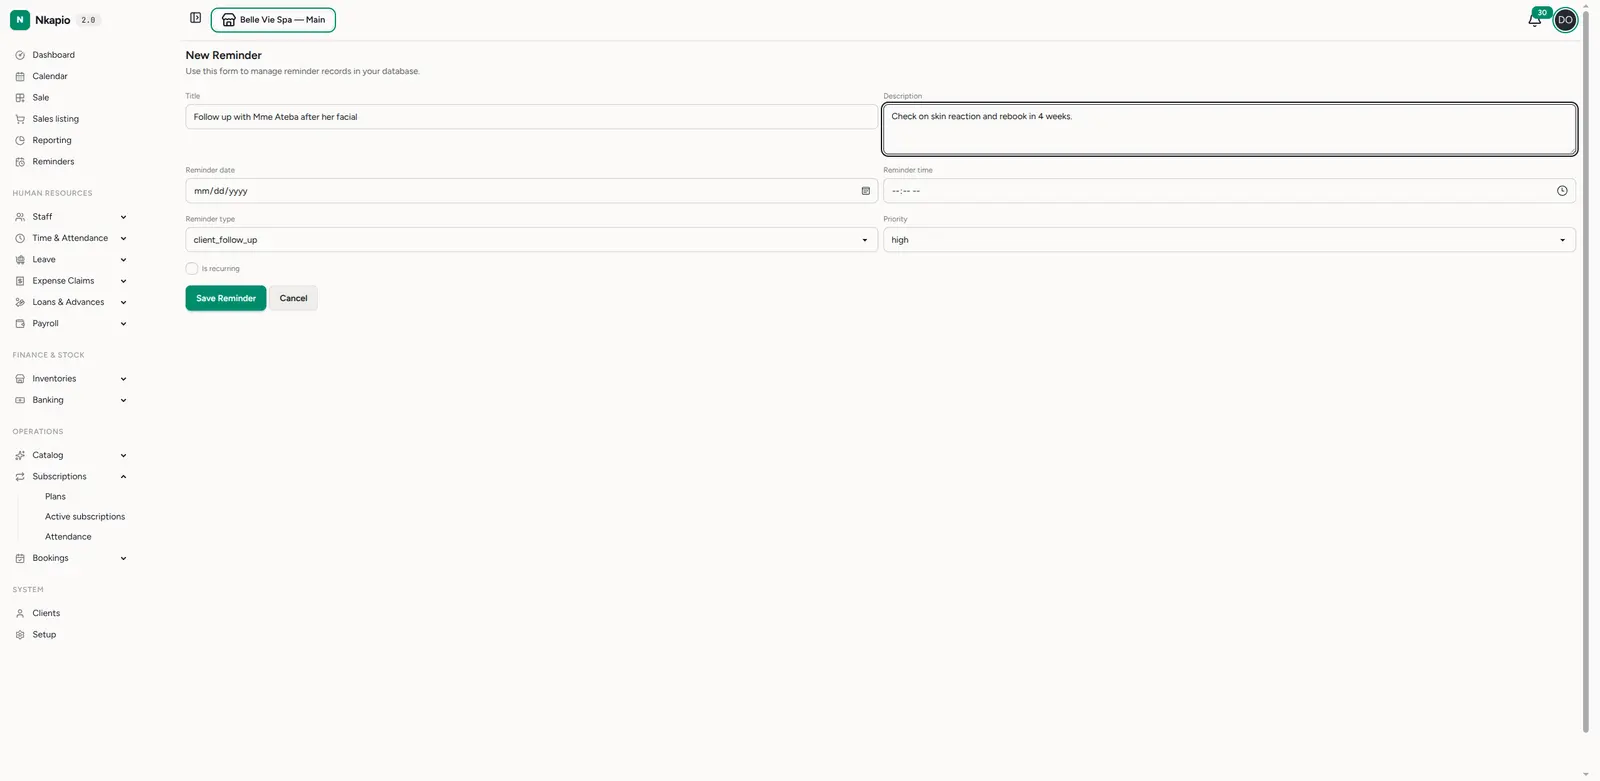
Click New Reminder and fill in the details:
- Title — a short, action-first description (e.g. "Follow up with Mme Ateba after her facial").
- Description — any extra context your team needs.
- Reminder date and Reminder time — the day and time it comes due (two separate fields).
- Reminder type — categorise it (see Step 3) so reminders of the same kind stay grouped. This is required.
- Priority — low, medium, high or urgent (defaults to medium).
- Is recurring — turn this on for something that repeats (e.g. a weekly restock check). Three more fields appear: a recurrence pattern (daily, weekly, monthly or yearly), a recurrence interval (e.g. every 2 weeks), and an optional recurrence end date. The pattern and interval are required once recurring is on.
Click Save Reminder and it appears in the list.
Step 3 — Manage reminder types
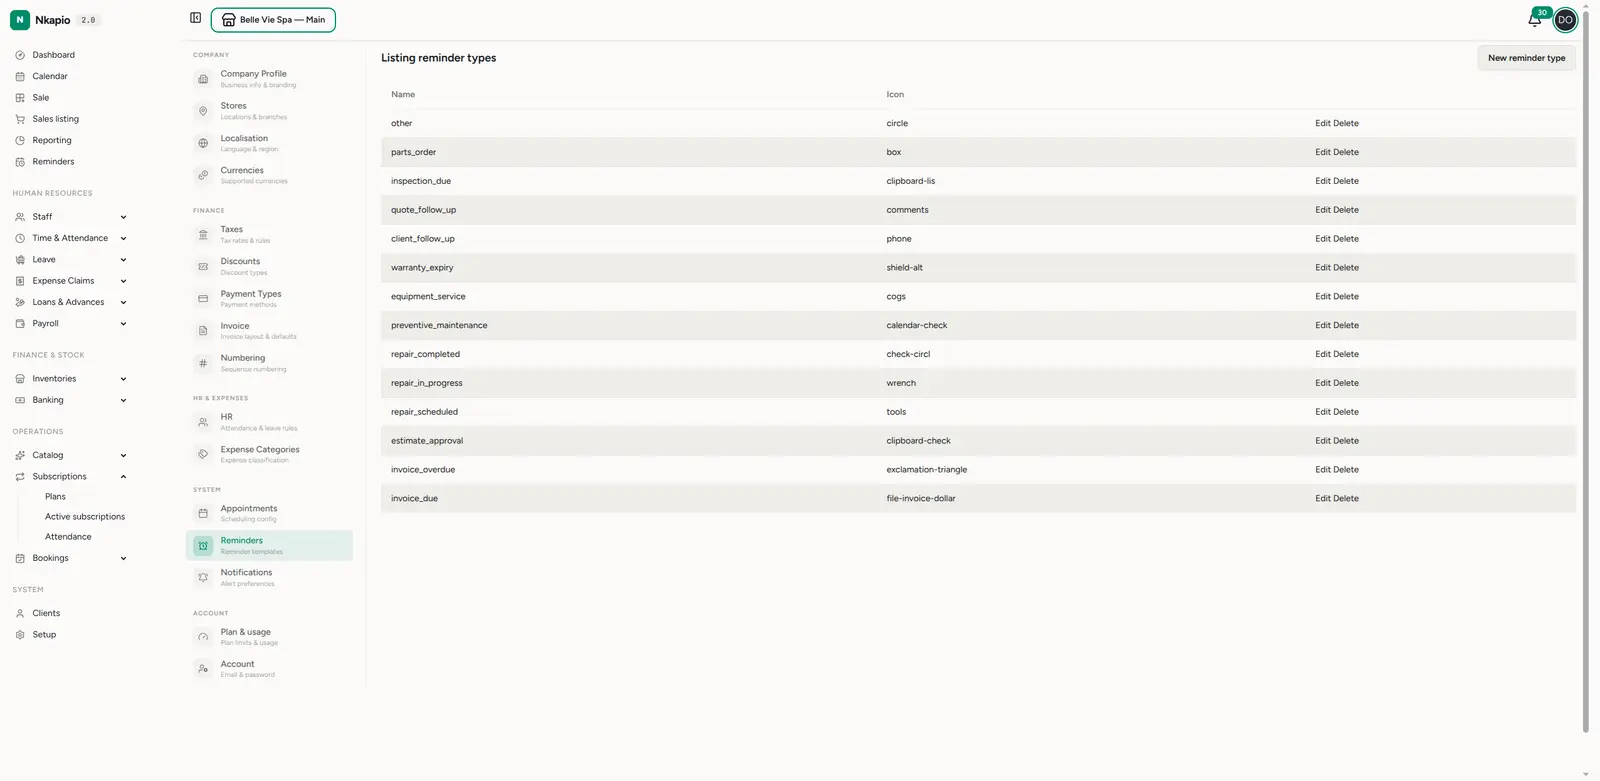
Reminder types let you sort reminders into categories that fit your business — client follow-ups, inspections, renewals, and so on. Manage them under Settings → Reminders. Each type carries a name and an icon; click New reminder type to add your own, or Edit / Delete to adjust the defaults.
Tips
- Priority drives your day — filter the list by urgent and high first thing in the morning.
- Recurring reminders save you from re-creating the same task; set the reminder as recurring instead of adding it again each time.
- Create from the calendar — click a day on the Calendar to add a reminder already dated to that day, without leaving the schedule.
- No "done" tick — once you've handled a reminder, delete it to clear it from the list. Recurring ones can stay in place.
- You manage your own — you can edit or delete the reminders you created.